

Overview
The Import feature creates many products at once from a structured file. A 3-step wizard takes you through uploading the file, mapping its columns to product fields, and reviewing the result before the import runs. Open it from Actions in the Products toolbar, then choose Import.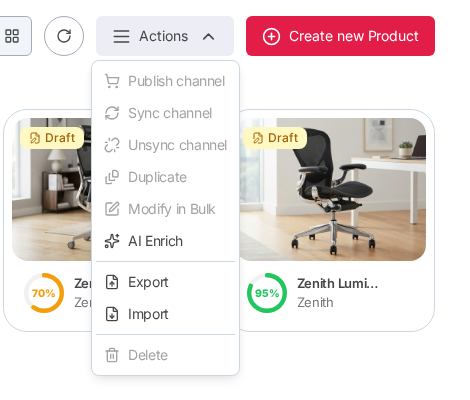
Supported file formats
Which formats you can pick depends on your plan.
The upload zone lists the formats your plan allows, up to 100 MB per file.
Steps
Step 1: Upload file
Drag your file onto the upload zone, or click it to browse. Download Template gives you a CSV with the correct column headers already in place.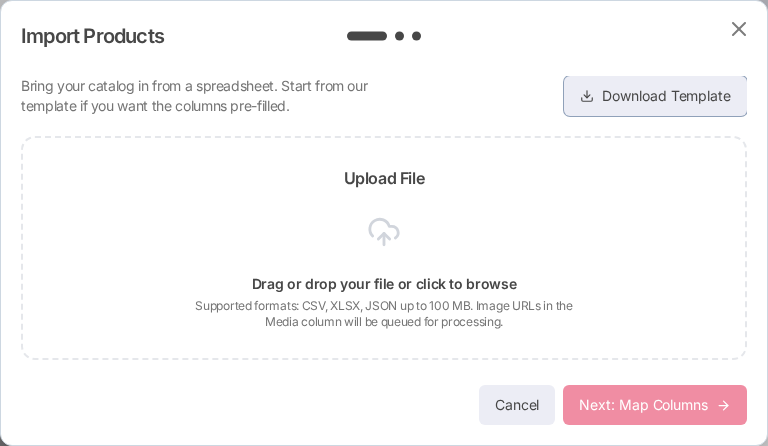
Step 2: Map columns
Sellufy matches your file’s columns to product fields and puts a confidence score on each one. Columns it does not recognise become Attributes.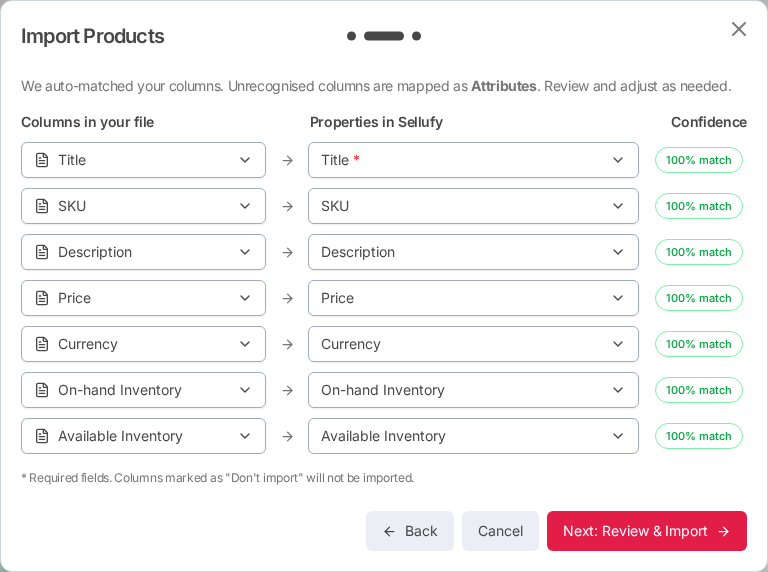
Columns in your file lists what you uploaded. Use the Properties in Sellufy dropdown beside
each one to change where it lands, or set it to Don’t import to leave that column out. Skipped
rows are dimmed. Fields marked with a red asterisk are required.
Click Next: Review & Import when the mapping looks right.
Step 3: Review & import
The summary counts the data rows that will be imported, the columns mapped, and the columns skipped. Below it, a preview shows the first 3 rows using only the mapped columns. The whole file still imports, not just the preview.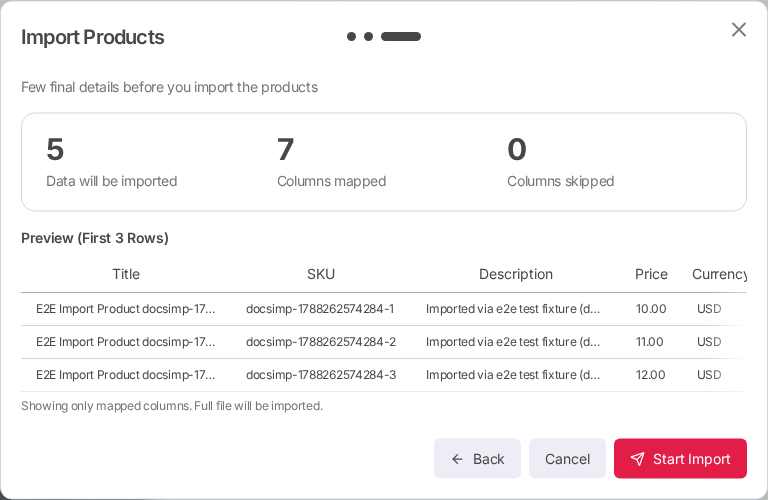
Required fields
Rows missing a required field may fail to import.
Enriching and publishing imported products
Auto-enrich and publish-to-channel are no longer part of the import wizard. Import your products first, then select them on the Products page and use AI Enrich or Publish channel from the same Actions menu. See AI Enrich and Channels.Image URLs in the Media column are stored as references and queued for processing. They are
not downloaded while you upload.